Home > Europe > United Kingdom > Scotland > Dundee > Dundee
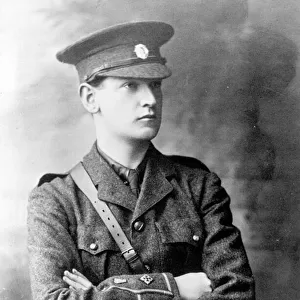
Troops of the Second Boer War (b / w photo)
")
![]()
Wall Art and Photo Gifts from Fine Art Finder
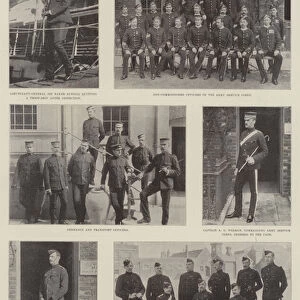
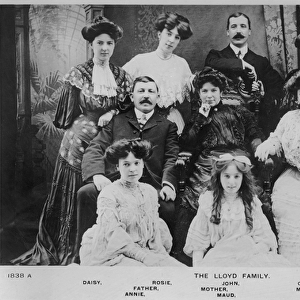
Troops of the Second Boer War (b / w photo)
1592826 Troops of the Second Boer War (b/w photo) by English Photographer, (19th century); Private Collection; (add.info.: Troops of the Second Boer War. Illustration for The Illustrated London News, 4 November 1899.
English Photographer (19th Century)); Look and Learn / Illustrated Papers Collection
Media ID 22314380
© Look and Learn / Illustrated Papers Collection / Bridgeman Images
1st Royal Dragoons 2nd Gordon Highlanders Cape Dundee Elandslaagte Killed Officers Royal Irish Fusiliers Second Boer War Staff Injuries Wound
FEATURES IN THESE COLLECTIONS
> Africa
> Related Images
> Africa
> South Africa
> Related Images
> Animals
> Fishes
> S
> Sergeant Major
> Arts
> Artists
> I
> Irish Photographer Irish Photographer
> Europe
> United Kingdom
> England
> London
> Royalty
> Europe
> United Kingdom
> Scotland
> Dundee
> Dundee
> Europe
> United Kingdom
> Scotland
> East Lothian
> Dunbar
> Europe
> United Kingdom
> Scotland
> Lothian
> Dunbar
> Fine Art Finder
> Artists
> English Photographer
> Fine Art Finder
> Artists
> Samuel (after) Begg
EDITORS COMMENTS
This print captures a poignant moment from the Second Boer War, taken by an English photographer in the 19th century. The image showcases a group of brave troops who fought valiantly during this historic conflict. Among them are soldiers from various regiments such as the 2nd Gordon Highlanders, 1st Royal Dragoons, and 1st Royal Irish Fusiliers. The photograph also highlights some key figures, including Colonel Stopford and Field Marshal Lord Wolseley, who played significant roles in leading their respective units. Sadly, it is impossible to ignore the somber reality of war depicted here - wounded soldiers being tended to by medical staff while others mourn fallen comrades. The composition offers a glimpse into the harsh realities faced by these courageous men on the battlefield. It serves as a reminder of their sacrifice and dedication to duty amidst challenging circumstances. The image evokes emotions ranging from admiration for their bravery to empathy for those affected by injuries sustained during combat. Preserved within this private collection, this historical artifact provides us with insight into one of history's most significant conflicts. Through photography's lens, we can better understand the experiences endured by those involved in shaping our world today.
MADE IN THE USA
Safe Shipping with 30 Day Money Back Guarantee
FREE PERSONALISATION*
We are proud to offer a range of customisation features including Personalised Captions, Color Filters and Picture Zoom Tools
SECURE PAYMENTS
We happily accept a wide range of payment options so you can pay for the things you need in the way that is most convenient for you
* Options may vary by product and licensing agreement. Zoomed Pictures can be adjusted in the Cart.