
5th Lancers Collection
"The 5th Lancers: A Glimpse into the Heroic Tales of War" Step back in time to the era of The Transvaal War


For sale as Licensed Images
Choose your image, Select your licence and Download the media
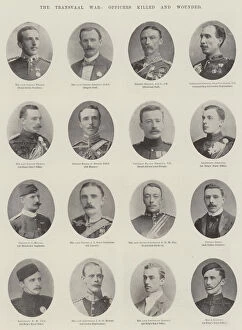
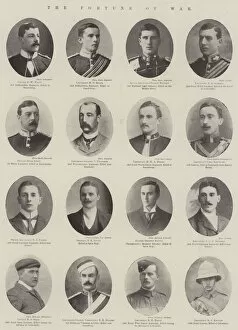
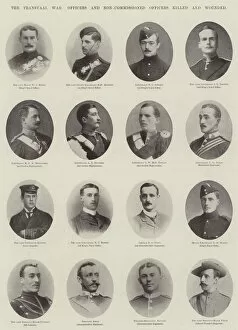
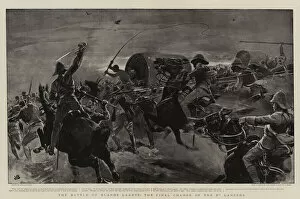
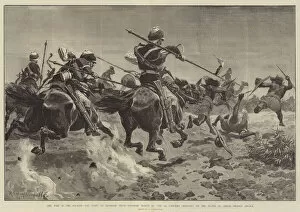
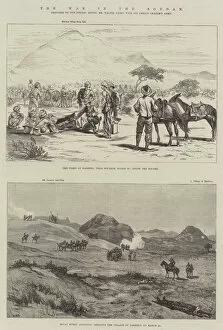
"The 5th Lancers: A Glimpse into the Heroic Tales of War" Step back in time to the era of The Transvaal War, where scenes at the Seat of Operations unfold before your eyes through captivating black and white photographs. Immerse yourself in history as you witness Sketches from the Camp of Exercise of the Indian Army in the Punjaub, beautifully engraved for posterity. Hold your breath as you delve into The Battle of Elandslaagte, and feel your heart race at the sight of "C" Squadron charging fearlessly, depicted vividly in an engraving. Marvel at their bravery and sacrifice as you explore The Transvaal War's Officers killed and wounded through poignant engravings that pay homage to these fallen heroes. Experience The Fortune of War captured hauntingly in a black and white photograph, reminding us all about the unpredictable nature of conflict. Reflect on those who paid the ultimate price with Officers and Non-Commissioned Officers killed and wounded portrayed solemnly yet powerfully in another monochromatic image. Prepare to be astounded by An Incident at Elandslaagte where a Veterinary Corporal demonstrates remarkable skill by spearing Two Boers with One Thrust - a lithograph that encapsulates both courage and resourcefulness amidst chaos. Witness Troops for the Cape departing for battle through an evocative black and white photograph from The Transvaal War. Seek solace alongside brave soldiers Sheltering from Boer Shells within the Donga of the 5th Lancers - a lithograph that captures not only their resilience but also their unyielding spirit. Finally, brace yourself for The Battle of Elands Laagte's climactic moment -the Final Charge led by none other than our valiant 5th Lancers. Let this lithograph etch itself into your memory forever as it immortalizes their unwavering determination against all odds.