
Ancient Rome Collection (page 6)

Step back in time and explore the wonders of Ancient Rome

Background imageAncient Rome Collection: 8919500

8919500

Background imageAncient Rome Collection: 8919478

8919478

Background imageAncient Rome Collection: 8966943

8966943

Background imageAncient Rome Collection: 8966942

8966942

Background imageAncient Rome Collection: 8966933

8966933

Background imageAncient Rome Collection: 8966920

8966920

Background imageAncient Rome Collection: 8966907

8966907

Background imageAncient Rome Collection: 8966904

8966904

Background imageAncient Rome Collection: 8918428

8918428

Background imageAncient Rome Collection: 8918356

8918356

Background imageAncient Rome Collection: 8918145

8918145

Background imageAncient Rome Collection: 8918127

8918127

Background imageAncient Rome Collection: 8918093

8918093

Background imageAncient Rome Collection: 8918055

8918055

Background imageAncient Rome Collection: 8917910

8917910

Background imageAncient Rome Collection: 8917888

8917888

Background imageAncient Rome Collection: Ptolemaeer-Kameo, 1820 (lithograph)

Ptolemaeer-Kameo, 1820 (lithograph)
8914783 Ptolemaeer-Kameo, 1820 (lithograph) by Fendi, Peter (1796-1842); Osterreichische Nationalbibliothek, Vienna, Austria; (add.info.: Ptolemaeer-Kameo, lithograph in black and 3 colours (blue)

Background imageAncient Rome Collection: 7335709

7335709

Background imageAncient Rome Collection: 7335706

7335706

Background imageAncient Rome Collection: 8619998

8619998

Background imageAncient Rome Collection: Mosaic floor with geometric decoration, late 2nd-early 3rd century AD, from via Piamarta (mosaic)

Mosaic floor with geometric decoration, late 2nd-early 3rd century AD, from via Piamarta (mosaic)
8620160 Mosaic floor with geometric decoration, late 2nd-early 3rd century AD, from via Piamarta (mosaic) by Roman, (2nd century); Museo di Santa Giulia, Museo della citta, Brescia

Background imageAncient Rome Collection: Mosaic floor with geometric decoration, late 2nd-early 3rd century AD, from via Piamarta (mosaic)

Mosaic floor with geometric decoration, late 2nd-early 3rd century AD, from via Piamarta (mosaic)
8620159 Mosaic floor with geometric decoration, late 2nd-early 3rd century AD, from via Piamarta (mosaic) by Roman, (2nd century); Museo di Santa Giulia, Museo della citta, Brescia

Background imageAncient Rome Collection: Geometric pattern from the Via san Rocchino domus, 2nd century AD (mosaic)

Geometric pattern from the Via san Rocchino domus, 2nd century AD (mosaic)
8620154 Geometric pattern from the Via san Rocchino domus, 2nd century AD (mosaic) by Roman, (2nd century); Museo di Santa Giulia, Museo della citta, Brescia

Background imageAncient Rome Collection: Geometric pattern from the Via san Rocchino domus, 2nd century AD (mosaic)

Geometric pattern from the Via san Rocchino domus, 2nd century AD (mosaic)
8620152 Geometric pattern from the Via san Rocchino domus, 2nd century AD (mosaic) by Roman, (2nd century); Museo di Santa Giulia, Museo della citta, Brescia

Background imageAncient Rome Collection: Geometric pattern from the Via san Rocchino domus, 2nd century AD (mosaic)

Geometric pattern from the Via san Rocchino domus, 2nd century AD (mosaic)
8620151 Geometric pattern from the Via san Rocchino domus, 2nd century AD (mosaic) by Roman, (2nd century); Museo di Santa Giulia, Museo della citta, Brescia

Background imageAncient Rome Collection: Geometric pattern from the Via san Rocchino domus, 2nd century AD (mosaic)

Geometric pattern from the Via san Rocchino domus, 2nd century AD (mosaic)
8620146 Geometric pattern from the Via san Rocchino domus, 2nd century AD (mosaic) by Roman, (2nd century); Museo di Santa Giulia, Museo della citta, Brescia

Background imageAncient Rome Collection: Mosaic fragment with geometric decoration, 1st century BC, from vicolo san Domenico (mosaic)

Mosaic fragment with geometric decoration, 1st century BC, from vicolo san Domenico (mosaic)
8620138 Mosaic fragment with geometric decoration, 1st century BC, from vicolo san Domenico (mosaic) by Roman, (1st century BC); Museo di Santa Giulia, Museo della citta, Brescia

Background imageAncient Rome Collection: The Brescia Winged Victory, roman art replica, depicting the capuan Aphrodite (plaster)

The Brescia Winged Victory, roman art replica, depicting the capuan Aphrodite (plaster)
8620132 The Brescia Winged Victory, roman art replica, depicting the capuan Aphrodite (plaster) by Roman, (1st century AD) (after); Museo di Santa Giulia, Museo della citta, Brescia

Background imageAncient Rome Collection: The battle of the Amazons, 2nd-3rd century AD

The battle of the Amazons, 2nd-3rd century AD
8620123 The battle of the Amazons, 2nd-3rd century AD by Roman, (2nd century); Museo di Santa Giulia, Museo della citta, Brescia, Italy; (add.info.: The battle of the Amazons, 2nd-3rd century AD)

Background imageAncient Rome Collection: 7335431

7335431

Background imageAncient Rome Collection: 7335308

7335308

Background imageAncient Rome Collection: 7335301

7335301

Background imageAncient Rome Collection: 7335295

7335295

Background imageAncient Rome Collection: 7335293

7335293

Background imageAncient Rome Collection: 7335291

7335291

Background imageAncient Rome Collection: Satyr and hermaphrodite, 1-50 AD (fresco)

Satyr and hermaphrodite, 1-50 AD (fresco)
6384234 Satyr and hermaphrodite, 1-50 AD (fresco) by Roman (1st century AD); Museo Archeologico Nazionale, Naples, Campania, Italy; (add.info.: Satyr and hermaphrodite, 1-50 AD, painting)

Background imageAncient Rome Collection: 8619789

8619789

Background imageAncient Rome Collection: 7335734

7335734

Background imageAncient Rome Collection: 7335730

7335730

Background imageAncient Rome Collection: 7335721

7335721

Background imageAncient Rome Collection: 7335720

7335720

Background imageAncient Rome Collection: 7335707

7335707

Background imageAncient Rome Collection: Dyptich of Boethius, 487 AD (ivory)

Dyptich of Boethius, 487 AD (ivory)
8620162 Dyptich of Boethius, 487 AD (ivory) by Roman (5th century AD); Museo di Santa Giulia, Museo della citta, Brescia, Italy; (add.info.: Dyptich of Boethius, 487 AD, ivory)

Background imageAncient Rome Collection: Geometric pattern from the Via san Rocchino domus, 2nd century AD (mosaic)

Geometric pattern from the Via san Rocchino domus, 2nd century AD (mosaic)
8620150 Geometric pattern from the Via san Rocchino domus, 2nd century AD (mosaic) by Roman, (2nd century); Museo di Santa Giulia, Museo della citta, Brescia

Background imageAncient Rome Collection: Geometric pattern from the Via san Rocchino domus, 2nd century AD (mosaic)

Geometric pattern from the Via san Rocchino domus, 2nd century AD (mosaic)
8620149 Geometric pattern from the Via san Rocchino domus, 2nd century AD (mosaic) by Roman, (2nd century); Museo di Santa Giulia, Museo della citta, Brescia

Background imageAncient Rome Collection: Geometric pattern from the Via san Rocchino domus, 2nd century AD (mosaic)

Geometric pattern from the Via san Rocchino domus, 2nd century AD (mosaic)
8620147 Geometric pattern from the Via san Rocchino domus, 2nd century AD (mosaic) by Roman, (2nd century); Museo di Santa Giulia, Museo della citta, Brescia

Background imageAncient Rome Collection: Geometric pattern from the Via san Rocchino domus, 2nd century AD (mosaic)

Geometric pattern from the Via san Rocchino domus, 2nd century AD (mosaic)
8620143 Geometric pattern from the Via san Rocchino domus, 2nd century AD (mosaic) by Roman, (2nd century); Museo di Santa Giulia, Museo della citta, Brescia

Background imageAncient Rome Collection: Geometric pattern from the Via san Rocchino domus, 2nd century AD (mosaic)

Geometric pattern from the Via san Rocchino domus, 2nd century AD (mosaic)
8620140 Geometric pattern from the Via san Rocchino domus, 2nd century AD (mosaic) by Roman, (2nd century); Museo di Santa Giulia, Museo della citta, Brescia


For sale as Licensed Images

Choose your image, Select your licence and Download the media

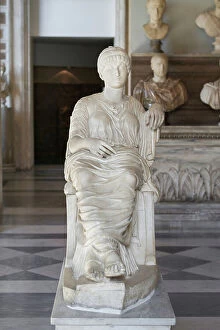
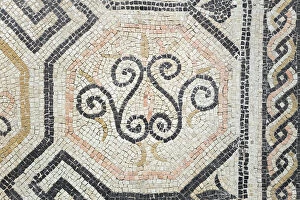
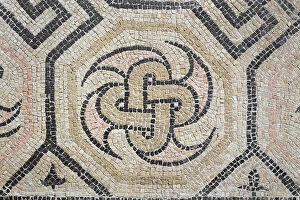
Step back in time and explore the wonders of Ancient Rome. From the vast Roman Empire to its intricate city layout, this antique map takes us on a journey through history. Marvel at the grandeur with its impressive architecture and bustling streets depicted on this captivating map. Delve into the rich culture and mythology of Rome as you admire the stunning Roman seafood mosaic. This intricate artwork showcases not only their culinary delights but also their appreciation for beauty in everyday life. The presence of Janus, the two-faced Roman god symbolizing beginnings and endings, reminds us of their belief in duality. Immerse yourself in one of history's most significant battles with a glimpse at the Battle of Cannae plan from 216 BC. Witness how strategic planning played a crucial role in shaping empires during that era. Explore Europe under Roman rule through another detailed map, highlighting their extensive territorial reach and influence. Travel back to an era defined by conflict as you observe the clash between the Roman Republic and Carthage during the Second Punic War (218-201 BC). These maps offer insight into how these powerful civilizations fought for dominance over land and resources. Discover Dionysus, or Bacchus, seated regally on his throne—a testament to Rome's fascination with Greek mythology. This statue represents their admiration for artistry while paying homage to deities believed to govern various aspects of life. Reflect upon mortality with a poignant memento mori mosaic—an artistic reminder that death is inevitable even amidst opulence. Such artworks served as reminders for Romans to live fully each day while acknowledging life's impermanence. Lastly, explore Italy's ancient landscapes through historical maps—tracing Italy's evolution throughout different periods within ancient times offers glimpses into its diverse cultures before unification. Marvel at Asclepius' statue—the revered god associated with healing—as it stands tall among other artifacts representing Rome's reverence for medicine and well-being.