
Battle Of Isandlwana Collection
"The Battle of Isandlwana: A Glimpse into the Fierce Anglo-Zulu Conflict" In this captivating collection of historical images


For sale as Licensed Images
Choose your image, Select your licence and Download the media
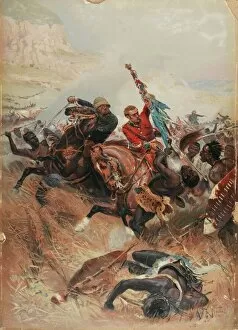
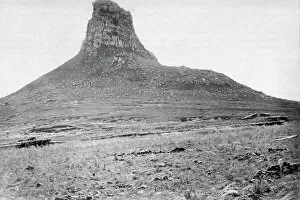
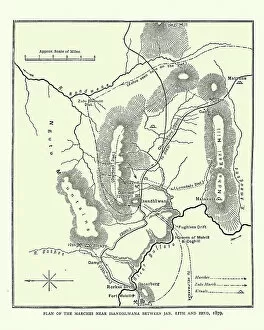
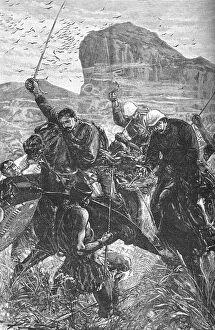
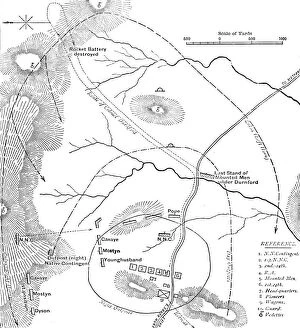
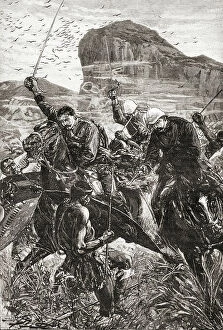
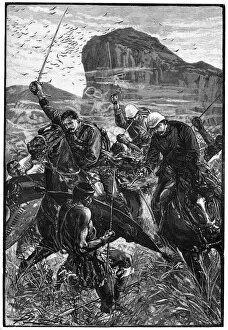
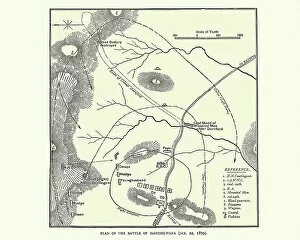
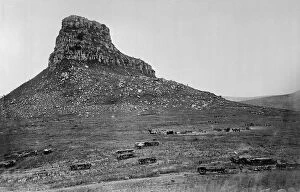
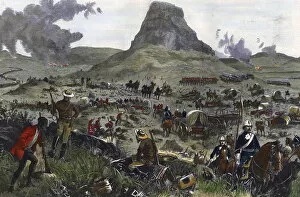
"The Battle of Isandlwana: A Glimpse into the Fierce Anglo-Zulu Conflict" In this captivating collection of historical images, we are transported back to the tumultuous events surrounding the Battle of Isandlwana during the Zulu War of 1879. The intensity and bravery displayed by both sides are vividly captured through various mediums. Lieutenants Melville and Coghill Saving the Colours is a chromolithograph that immortalizes their heroic efforts to protect their regiment's flag amidst chaos and danger. Their unwavering determination symbolizes the resilience of British forces in the face of adversity. Isandlwana Mountain looms ominously in a black-and-white photograph, serving as a haunting backdrop for one of history's most significant battles. It reminds us that even nature itself can bear witness to human conflict. The Dash with the Colours showcases an artist's interpretation from 1880, depicting soldiers valiantly charging forward amidst swirling dust and flying spears. This artwork captures not only action but also conveys the spirit and energy present on that fateful day. A detailed Plan of the Battle provides insight into strategic maneuvers employed by both armies, highlighting key positions and movements during this historic clash. It offers a glimpse into military tactics utilized during this era. Another depiction titled The dash with colours showcases another perspective on this pivotal moment in history, emphasizing its significance within Anglo-Zulu War lore. Its creation in 1900 demonstrates how these events continued to captivate artists long after they occurred. A map detailing Isandlwana's surroundings helps us understand how geography played a role in shaping battlefield dynamics. It allows us to visualize troop movements across rugged terrain while appreciating its impact on tactical decision-making. Isandhlwana after battle presents an ink-and-wash drawing illustrating scenes post-conflict; it serves as a testament to war's devastating aftermath while capturing poignant moments amid the ruins.