
Nana Sahib Collection
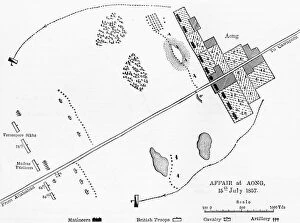
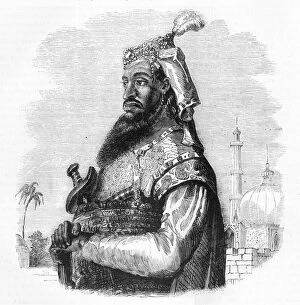
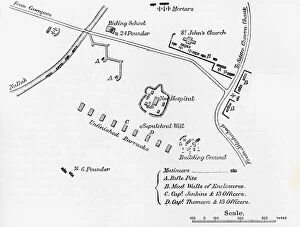
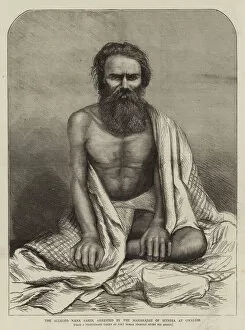
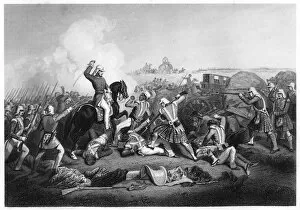
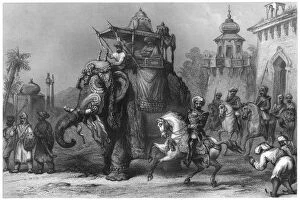
"Nana Sahib: The Enigmatic Figure Behind the Cawnpore Massacre" In the annals of Indian history, few names evoke as much intrigue and horror as that of Nana Sahib


For sale as Licensed Images
Choose your image, Select your licence and Download the media
"Nana Sahib: The Enigmatic Figure Behind the Cawnpore Massacre" In the annals of Indian history, few names evoke as much intrigue and horror as that of Nana Sahib. Known for his alleged involvement in the infamous Cawnpore Massacre during the Indian Rebellion of 1857, Nana Sahib's legacy remains shrouded in mystery. The haunting engravings depicting the aftermath of the Cawnpore Massacre serve as a chilling reminder of this dark chapter. The memorials stand as solemn testaments to the lives lost and atrocities committed within those bloodstained walls. As we gaze upon these images, we are transported back to that fateful day when chaos reigned supreme. Amongst these depictions lies a portrait capturing Nana Sahib's face – a man whose role in this tragedy is still debated today. Was he truly responsible for orchestrating such brutality or merely an unwitting pawn caught up in larger political machinations? Further clues emerge from James Grant's intricate plans and illustrations. A glimpse into the court at Cawnpore reveals where this massacre unfolded, while another plan details an affair at Aong – perhaps shedding light on events leading up to that tragic day. Yet, even with all these visual cues, Nana Sahib himself remains elusive. Reports vary regarding his capture or escape; conflicting engravings depict contrasting versions of events. One engraving portrays him arrested by Maharajah Scindia at Gwalior, while another suggests he was never apprehended at all. General Havelock's attack on Futtypore serves as evidence of British retaliation against Nana Sahib's alleged crimes – a relentless pursuit fueled by vengeance and justice alike. Meanwhile, an image captures him alongside his escort - a fleeting glimpse into his life before infamy consumed him. As we delve deeper into history's recesses, questions arise about motivations and the true nature of Nana Sahib's involvement.