
Second Anglo Afghan War Collection (#5)
"The Second Anglo-Afghan War: A Tale of Heroism, Strategy, and Tragedy" In the annals of military history


For sale as Licensed Images
Choose your image, Select your licence and Download the media
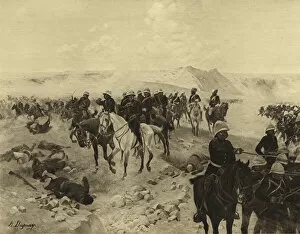
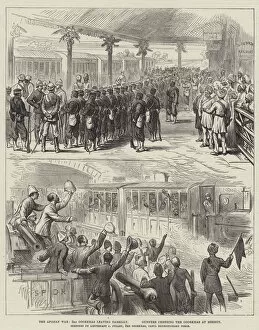
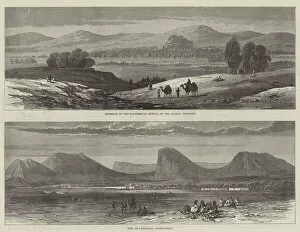
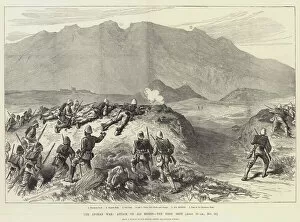
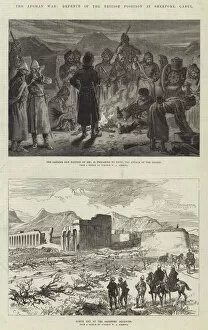
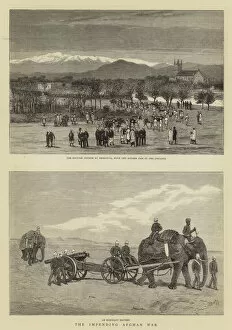
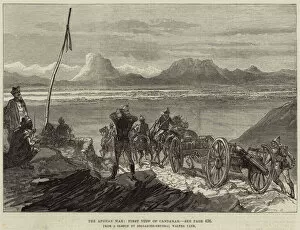
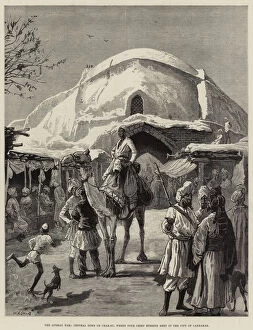
"The Second Anglo-Afghan War: A Tale of Heroism, Strategy, and Tragedy" In the annals of military history, the Second Anglo-Afghan War stands as a testament to the bravery and resilience of soldiers from The Royal Berkshire Regiment. One such display of valor was witnessed at Maiwand in 1880, where their heroic stand became legendary. The conflict itself was marked by strategic maneuvers and meticulously planned attacks. Detailed plans showcasing the British assault on Ali Masjid Fort in 1878 reveal the intricacy with which they approached each battle. Similarly, maps outlining the Battle of Peiwar Kotal highlight the precision employed by General Frederick Roberts during his march to victory. As battles raged on Afghan soil, other significant events unfolded. The Battle of Charasiab in 1879 saw fierce clashes that shaped the course of this war. Meanwhile, General Burrows' march to Helmund showcased determination amidst challenging terrains. One pivotal moment came during the Battle of Kandahar in 1880 when British forces triumphed against all odds. This victory proved crucial for their campaign's success and brought an end to this chapter in Afghan history. However, not all aspects were tales of heroism or grand victories. Engravings depicting executions outside Cabul's Residency serve as somber reminders that war often carries a heavy toll on both sides involved. These images also capture ruins left behind after intense fighting ravaged areas once occupied by British forces. Decades later, memories still lingered as seen through depictions like "The Afghan War" showing Highlanders and Gurkas storming Gandia Mullah in 1901—an enduring symbolization of courage passed down through generations. The Second Anglo-Afghan War remains etched into history books as a complex tapestry woven with acts both noble and tragic—a reminder that conflicts shape nations but leave scars too deep to be forgotten easily.