
Trip Collection (page 100)
Embarking on a journey of exploration and discovery, my trip took me across continents and oceans, unraveling the mysteries that lie within


For sale as Licensed Images
Choose your image, Select your licence and Download the media
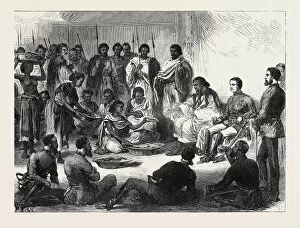
Embarking on a journey of exploration and discovery, my trip took me across continents and oceans, unraveling the mysteries that lie within. As I traced the lines on the political map of Africa, I couldn't help but feel a sense of awe at the vastness and diversity this continent holds. Intrigued by history's tales, I found myself delving into Erebus and Terror - Franklin's last trip. Imagining the courage it must have taken to venture into uncharted territories, I felt a deep appreciation for those who dared to push boundaries in pursuit of knowledge. Closer to home, Manchesters last tram whispered stories from days gone by. The echoes of bustling streets filled with commuters painted vivid pictures in my mind as I imagined what life was like during those simpler times. From Teignmouth in south Devon to Seahouses in Northumberland, England unfolded its picturesque landscapes before me. Each destination offered its own unique charm – be it the tranquil shores or vibrant coastal villages – leaving an indelible mark on my soul. Crossing over to St. Thomas in the United States Virgin Islands brought forth visions of turquoise waters and sun-kissed beaches. The West Indies' warm embrace welcomed me as I immersed myself in Caribbean culture while exploring this tropical paradise. Sennen Cove's rugged beauty captivated my senses as waves crashed against majestic cliffs along Cornwall's coast. Further along stood Polperro with its quaint harbor village exuding timeless charm - a glimpse into England's maritime heritage. Noss Mayo beckoned me with its idyllic setting on Devon's south coast; here tranquility reigned supreme amidst nature’s wonders. Instow greeted me with open arms, offering respite from city life through serene walks along sandy shores where time seemed suspended. As dusk settled upon St Marys Island’s tidal causeway leading towards St Marys Lighthouse, an ethereal glow enveloped everything around me.