
Wars Of Scottish Independence Collection

"The Wars of Scottish Independence

Background imageWars Of Scottish Independence Collection: Statue of Sir William Wallace at Aberdeen (engraving)

Statue of Sir William Wallace at Aberdeen (engraving)
1595476 Statue of Sir William Wallace at Aberdeen (engraving) by English School, (19th century); Private Collection; (add.info.: Statue of Sir William Wallace at Aberdeen)

Background imageWars Of Scottish Independence Collection: Portrait of William Wallace (engraving)

Portrait of William Wallace (engraving)
960367 Portrait of William Wallace (engraving) by Kay, John (1742-1826) (after); Private Collection; (add.info.: Sir William Wallace)

Background imageWars Of Scottish Independence Collection: Portrait of William Wallace (engraving)

Portrait of William Wallace (engraving)
819379 Portrait of William Wallace (engraving) by English School, (19th century); Private Collection; (add.info.: Sir William Wallace)

Background imageWars Of Scottish Independence Collection: Stirling Castle, 1890. Creator: Unknown

Stirling Castle, 1890. Creator: Unknown
Stirling Castle, 1890. There have been at least eight sieges at Stirling Castle dating c1110, when King Alexander I dedicated a chapel here

Background imageWars Of Scottish Independence Collection: CAE1111212

CAE1111212
A view toward Caerlaverock Castle

Background imageWars Of Scottish Independence Collection: The Trial of Sir William Wallace, 1925

The Trial of Sir William Wallace, 1925. From Highroads of History, book II: Stories from British History, published by Thomas Nelson and Sons (London, Edinburgh, New York, 1925)

Background imageWars Of Scottish Independence Collection: Edward I, c1880

Edward I, c1880. Edward I (1239-1307), King of England. From British Battles on Land and Sea, Vol. III, by James Grant. [Cassell Petter & Galpin, London, Paris & New York, c1880]

Background imageWars Of Scottish Independence Collection: Edward I. At Berwick, c1880

Edward I. At Berwick, c1880. Edward I (1239-1307), King of England. Episode from the Capture of Berwick (1296). From British Battles on Land and Sea, Vol. III, by James Grant

Background imageWars Of Scottish Independence Collection: Death of James II. of Scotland, c1880

Death of James II. of Scotland, c1880. Episode from the Capture of Roxburgh (1460). From British Battles on Land and Sea, Vol. III, by James Grant

Background imageWars Of Scottish Independence Collection: Berwick, c1880

Berwick, c1880. Episode from the Capture of Berwick (1296). From British Battles on Land and Sea, Vol. III, by James Grant. [Cassell Petter & Galpin, London, Paris & New York, c1880]

Background imageWars Of Scottish Independence Collection: Wallace rejects the English proposals, 1297 (1864). Artist: James William Edmund Doyle

Wallace rejects the English proposals, 1297 (1864). Artist: James William Edmund Doyle
Wallace rejects the English proposals, 1864. William Wallace, (c1270-1305)) rejects the English proposals, carried by two Dominican monks

Background imageWars Of Scottish Independence Collection: The Siege of Berwick, c1880

The Siege of Berwick, c1880. Capture of Berwick (1318). From British Battles on Land and Sea, Vol. III, by James Grant. [Cassell Petter & Galpin, London, Paris & New York, c1880]

Background imageWars Of Scottish Independence Collection: Lochleven, c1880

Lochleven, c1880. Episode from the Second War of Scottish Independence (1332-1357). From British Battles on Land and Sea, Vol. III, by James Grant

Background imageWars Of Scottish Independence Collection: Inverury, c1880

Inverury, c1880. From British Battles on Land and Sea, Vol. III, by James Grant. [Cassell Petter & Galpin, London, Paris & New York, c1880]

Background imageWars Of Scottish Independence Collection: Pontefract Castle, c1880

Pontefract Castle, c1880. Episode of the Bruce Campaign in Ireland (1315-1318). From British Battles on Land and Sea, Vol. III, by James Grant

Background imageWars Of Scottish Independence Collection: Edinburgh Castle, c1880

Edinburgh Castle, c1880. Edinburgh Castle is a historic fortress which dominates the skyline of the city of Edinburgh. It was the site of sieges

Background imageWars Of Scottish Independence Collection: Robert the Bruce reviewing his troops before the Battle of Bannockburn, 1314 (1905). Artist: EBL

Robert the Bruce reviewing his troops before the Battle of Bannockburn, 1314 (1905). Artist: EBL
Robert the Bruce reviewing his troops before the Battle of Bannockburn, 1314 (1905). From Cassells Illustrated History of England, Vol. I


For sale as Licensed Images

Choose your image, Select your licence and Download the media

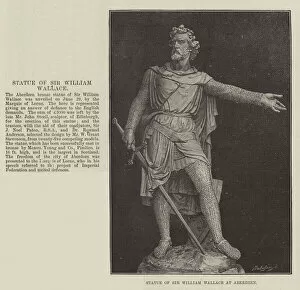
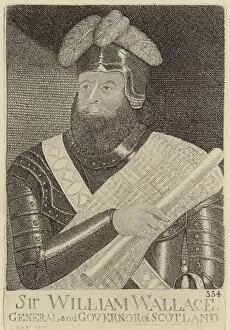
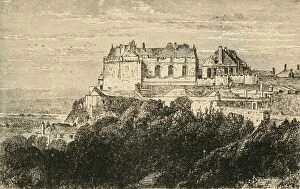
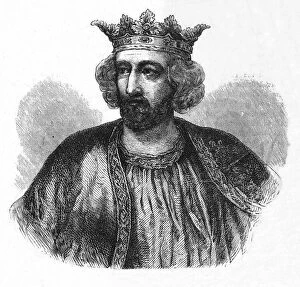
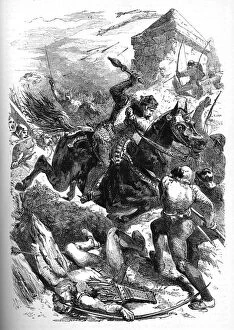
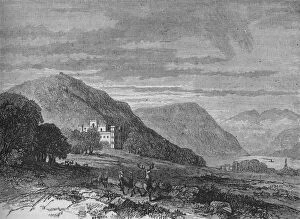
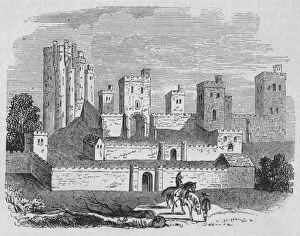
"The Wars of Scottish Independence: A Struggle for Freedom and Identity" The statue of Sir William Wallace at Aberdeen stands as a powerful reminder of Scotland's fight for independence. Through the engraved portrait, we catch a glimpse of the fierce determination in William Wallace's eyes, symbolizing his unwavering commitment to liberate Scotland. Another striking engraving portrays William Wallace, depicting his heroic stance against English oppression during the Wars of Scottish Independence. Stirling Castle, captured in an 1890 photograph by an unknown creator, witnessed intense battles that shaped Scotland's destiny during this pivotal period. Edward I, depicted in a c1880 image, was both feared and despised by Scots as he sought to tighten England's grip on their land. At Berwick, another c1880 portrayal shows Edward I asserting his authority over Scottish territories with ruthless force. The death of James II marked a turning point in the wars; captured in a c1880 illustration, it signified both loss and renewed determination among Scots to continue their struggle for freedom. Berwick itself became a battleground during these conflicts; captured through an artistic lens in c1880 imagery showcasing its significance within the wider conflict narrative. In 1297 (1864), artist James William Edmund Doyle depicts Wallace rejecting English proposals with defiance and resilience—a defining moment that rallied Scots behind their national hero. The Siege of Berwick is immortalized through another c1880 depiction—an enduring testament to the relentless fighting spirit displayed by both sides throughout these turbulent times. Lochleven emerges as yet another site entangled within this historical tapestry—c1880 imagery captures its role amidst shifting allegiances and strategic importance during the wars' unfolding drama