Home > Europe > United Kingdom > Scotland > Edinburgh > Edinburgh
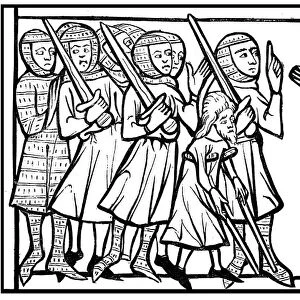
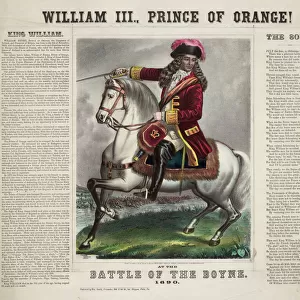
The Battle of Belmont, 23rd November 1899 - Bayonet Attack by the Scots and Grenadier Guards

![]()
Wall Art and Photo Gifts from Heritage Images
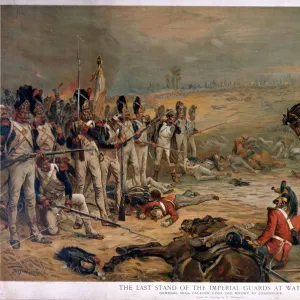
The Battle of Belmont, 23rd November 1899 - Bayonet Attack by the Scots and Grenadier Guards
The Battle of Belmont, 23rd November 1899 - Bayonet Attack by the Scots and Grenadier Guards, 1900. From " South Africa and the Transvaal War, Vol. II", by Louis Creswicke. [T. C. & E. C. Jack, Edinburgh, 1900]
Heritage Images features heritage image collections
Media ID 19778907
© The Print Collector/Heritage Images
1899 1902 2nd Boer War 3rd Baron Methuen Advancing Assault Bamp W Baron Methuen Boer Boer War Boer Wars Boers British Army Conflict Creswicke Dadd Frank Frank Dadd Jack Lord Methuen Louis Louis Creswicke Methuen Paul Sandford Paul Sandford Methuen Second Boer War Second Transvaal War South Africa South Africa And The Transvaal War South African War Tc And Ec Tc And Ec Jack Transvaal War Victory Wound Wounded Battlefield British Empire
FEATURES IN THESE COLLECTIONS
> Africa
> South Africa
> Related Images
> Animals
> Fishes
> G
> Grenadier
> Arts
> Artists
> D
> Frank Dadd
> Arts
> Literature
> Illustration
> Arts
> Literature
> Europe
> United Kingdom
> Scotland
> Edinburgh
> Edinburgh
> Europe
> United Kingdom
> Scotland
> Lothian
> Edinburgh
> Historic
> Battles
> Related Images
The Battle of Belmont, 23rd November 1899 - Bayonet Attack by the Scots and Grenadier Guards
EDITORS COMMENTS
. This powerful print captures a pivotal moment in history during the Second Boer War. The image depicts a fierce bayonet attack led by the brave Scots and Grenadier Guards on the battlefield of Belmont. The soldiers, adorned in their military uniforms, advance with determination and courage as they engage in close combat with the enemy. The photograph is taken from Louis Creswicke's book "South Africa and the Transvaal War, Vol. II", published in 1900. It serves as a visual testament to the intensity of warfare experienced during this colonial conflict between Britain's armed forces and the Boers. In this scene of chaos and violence, we witness both victory and sacrifice. The soldiers press forward amidst gunfire, risking life and limb for their country. Their unwavering resolve reflects not only their dedication to duty but also their belief in defending British interests abroad. Through this illustration captured by Frank Dadd, viewers are transported back to an era defined by territorial disputes and imperial ambitions. It serves as a reminder of the human cost that accompanies such conflicts – lives lost or forever changed due to wounds sustained on these battlefields. As we reflect upon this historical moment frozen in time, let us remember those who fought valiantly for what they believed was right while acknowledging both sides' experiences within this complex chapter of South African history.
MADE IN THE USA
Safe Shipping with 30 Day Money Back Guarantee
FREE PERSONALISATION*
We are proud to offer a range of customisation features including Personalised Captions, Color Filters and Picture Zoom Tools
SECURE PAYMENTS
We happily accept a wide range of payment options so you can pay for the things you need in the way that is most convenient for you
* Options may vary by product and licensing agreement. Zoomed Pictures can be adjusted in the Cart.