Boer Wars Collection (#4)

The Boer Wars, a tumultuous chapter in history, witnessed the clash between the British Empire and the resilient Boer republics of South Africa

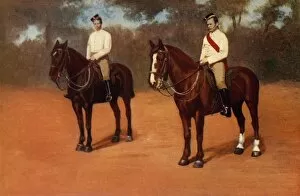
Background imageBoer Wars Collection: Sergeant - 18th Hussars, 1901. Creator: Gregory & Co

Sergeant - 18th Hussars, 1901. Creator: Gregory & Co
Sergeant - 18th Hussars, 1901. 18th Royal Hussars, a cavalry regiment of the British Army was deployed to South Africa in 1899 for service in the Second Boer War

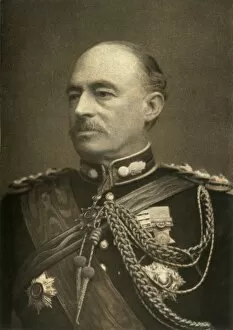
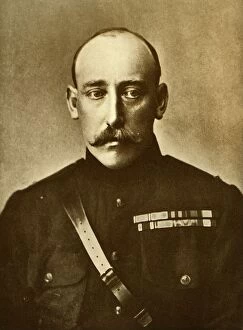
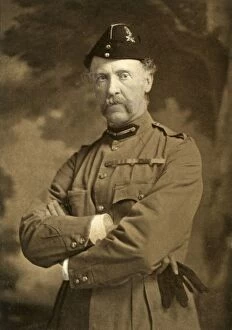
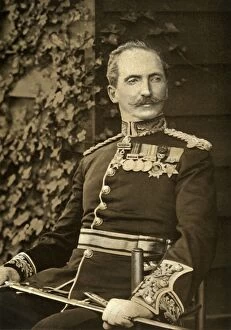
Background imageBoer Wars Collection: Lieutenant-General Tucker, C. B. 1901. Creator: Raja Deen Dajal

Lieutenant-General Tucker, C. B. 1901. Creator: Raja Deen Dajal
Lieutenant-General Tucker, C.B. 1901. Charles Tucker (1838-1935) British Army officer who commanded the garrison in the City of Pretoria

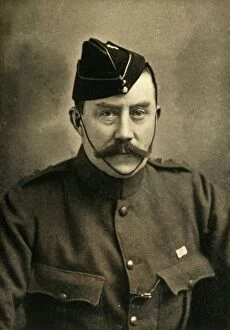
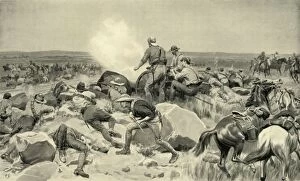
Background imageBoer Wars Collection: Mounted Infantry, 1901. Creator: Gregory & Co

Mounted Infantry, 1901. Creator: Gregory & Co
Mounted Infantry, 1901. In the Second Boer War, the British raised large forces of mounted infantry who rode horses instead of marching. From " South Africa and the Transvaal War, Vol

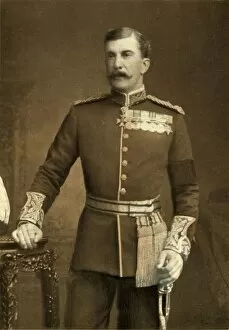
Background imageBoer Wars Collection: Major-General Sir H. H. Settle, 1902. Creator: Elliott & Fry

Major-General Sir H. H. Settle, 1902. Creator: Elliott & Fry
Major-General Sir H. H. Settle, 1902. Settles Scouts were named after Colonel Sir H H Settle KCB DSO RE. From " South Africa and the Transvaal War, Vol. VII", by Louis Creswicke

Background imageBoer Wars Collection: Colonel Lord Chesham, Imperial Yeomanry, 1901. Creator: Russell & Sons

Colonel Lord Chesham, Imperial Yeomanry, 1901. Creator: Russell & Sons
Colonel Lord Chesham, Imperial Yeomanry, 1901. Charles Cavendish (1850- 1907), commanded the 10th battalion of the Imperial Yeomanry in the Second Boer War

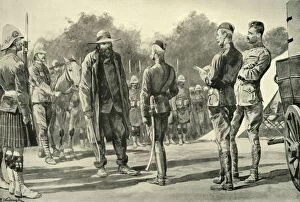
Background imageBoer Wars Collection: The Reddersburg Mishap: Men of the Irish Rifles and Mounted Infantry Delivering Up Their Arms

The Reddersburg Mishap: Men of the Irish Rifles and Mounted Infantry Delivering Up Their Arms, 1901. Troops led by General Christiaan de Wet attacked a convoy of 600 of the Royal Irish Rifles

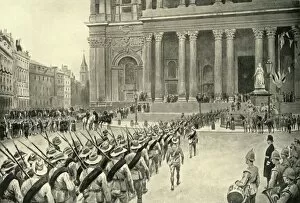
Background imageBoer Wars Collection: Return of the City Imperial Volunteers: Arrival at St. Pauls Cathedral, 1901. Creators

Return of the City Imperial Volunteers: Arrival at St. Pauls Cathedral, 1901. Creators
Return of the City Imperial Volunteers: Arrival at St. Pauls Cathedral, 1901. From " South Africa and the Transvaal War, Vol. VI", by Louis Creswicke. [T. C. & E. C. Jack, Edinburgh, 1901]

Background imageBoer Wars Collection: Lieut. -General Sir Archibald Hunter, K. C. B. 1901. Creator: Bassano Ltd

Lieut. -General Sir Archibald Hunter, K. C. B. 1901. Creator: Bassano Ltd
Lieut.-General Sir Archibald Hunter, K.C.B. 1901. Sir Archibald Hunter (1856-1936) senior officer in the British Army who distinguished himself during the Boer War, leading the march on Pretoria

Background imageBoer Wars Collection: H. H. Prince Christian, 1901. Creator: Russell & Sons

H. H. Prince Christian, 1901. Creator: Russell & Sons
H. H. Prince Christian, 1901. Prince Christian Victor of Schleswig-Holstein (1867 -1900) grandson of Queen Victoria, served as a staff officer in the Second Boer War in the relief of Ladysmith under

Background imageBoer Wars Collection: Colonel Plumers Gallant Attempt to Relieve Mafeking from the North, 1900. Creator: Frank Dadd

Colonel Plumers Gallant Attempt to Relieve Mafeking from the North, 1900. Creator: Frank Dadd
Colonel Plumers Gallant Attempt to Relieve Mafeking from the North, 1900. The Siege of Mafeking lasted 217 days during the Second Boer War

Background imageBoer Wars Collection: Surrendered Boers at Belfast Anxious to Join the National Scouts, 1902. Creator: F de Harnen

Surrendered Boers at Belfast Anxious to Join the National Scouts, 1902. Creator: F de Harnen
Surrendered Boers at Belfast Anxious to Join the National Scouts after being addressed by Lord Kitchener, 1902. Lord Kitchener as Chief of Staff (1900-1902)

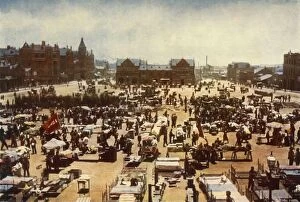
Background imageBoer Wars Collection: Market Square, Johannesburg, Transvaal Colony, 1901. Creator: GW Wilson and Company

Market Square, Johannesburg, Transvaal Colony, 1901. Creator: GW Wilson and Company
Market Square, Johannesburg, Transvaal Colony, 1901. From " South Africa and the Transvaal War, Vol. VI", by Louis Creswicke. [T. C. & E. C. Jack, Edinburgh, 1901]

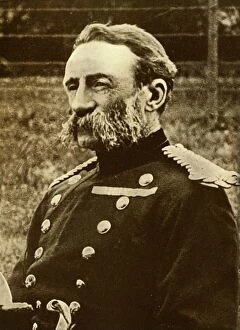
Background imageBoer Wars Collection: Lieutenant-General Sir Francis Clery, K. C. B. 1901. Creator: J&S Cumming

Lieutenant-General Sir Francis Clery, K. C. B. 1901. Creator: J&S Cumming
Lieutenant-General Sir Francis Clery, K.C.B. 1901. Francis Clery (1838-1926) British Army officer who took part in the Anglo-Zulu War

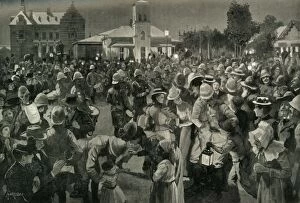
Background imageBoer Wars Collection: The British Occupation of Bloemfontein - An Evening Concert, 1900. Creator: A Forestier

The British Occupation of Bloemfontein - An Evening Concert, 1900. Creator: A Forestier
The British Occupation of Bloemfontein - An Evening Concert in Market Square by the Pipers of the Highland Brigade, 1900. British forces entered the Orange Free State

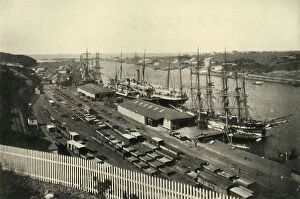
Background imageBoer Wars Collection: The Harbour, Buffalo River, East London, 1901. Creator: Wilson

The Harbour, Buffalo River, East London, 1901. Creator: Wilson
The Harbour, Buffalo River, East London, 1901. East London served as a supply port to service military headquarters at nearby King Williams Town. From " South Africa and the Transvaal War, Vol

Background imageBoer Wars Collection: Strathconas Horse, 1900. Creator: Pittaway

Strathconas Horse, 1900. Creator: Pittaway
Strathconas Horse, 1900. Strathconas Horse landed in Cape Town on 10th April 1900. Up until then Lord Strathcona had covered the costs but the regiment was funded by the British Government as soon as

Background imageBoer Wars Collection: Brilliant Defence by New Zealanders at Holspruit, February 25, 1902, 1902. Creator

Brilliant Defence by New Zealanders at Holspruit, February 25, 1902, 1902. Creator
Brilliant Defence by New Zealanders at Holspruit, February 25, 1902, 1902. Hoedspruit in Limpopo, South Africa was seconded by the British as a garrison to intercept shipments of arms being sent by

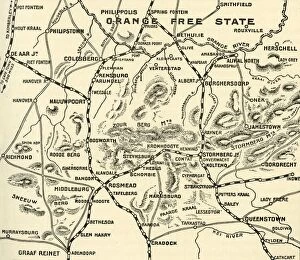
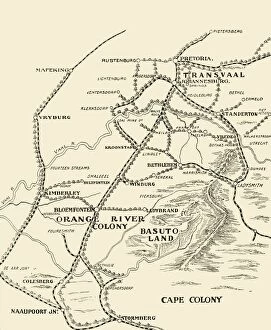
Background imageBoer Wars Collection: Map Illustrating the Operations on the Orange River, 1900. Creator: Unknown

Map Illustrating the Operations on the Orange River, 1900. Creator: Unknown
Map Illustrating the Operations on the Orange River, 1900. British forces entered the territory of the Orange Free State and occupied the capital Bloemfontein on 13 March 1900

Background imageBoer Wars Collection: Conveying Wounded to Wynberg Hospital Camp, 1900. Creator: Alfs Hosking

Conveying Wounded to Wynberg Hospital Camp, 1900. Creator: Alfs Hosking
Conveying Wounded to Wynberg Hospital Camp, 1900. A Military Hospital was set up at Wynberg, a suburb of Cape Town suring the Second Boer War. From " South Africa and the Transvaal War, Vol

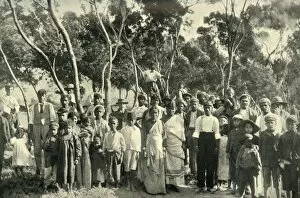
Background imageBoer Wars Collection: Hindoo Refugees from the Transvaal in Camp at Cape Town, 1900. Creator: Alfs Hosking

Hindoo Refugees from the Transvaal in Camp at Cape Town, 1900. Creator: Alfs Hosking
Hindoo Refugees from the Transvaal in Camp at Cape Town, 1900. Many Indians in South Africa are descendants of migrants from colonial India. From " South Africa and the Transvaal War, Vol

Background imageBoer Wars Collection: Lieut. -General Hon. N. G. Lyttelton, C. B. 1900. Creator: Unknown

Lieut. -General Hon. N. G. Lyttelton, C. B. 1900. Creator: Unknown
Lieut.-General Hon. N. G. Lyttelton, C.B. 1900. Neville Gerald Lyttelton (1845-1931) British Army officer who served in the Second Boer War

Background imageBoer Wars Collection: The 2nd Northampton Regiment, 1901. Creator: Gregory & Co

The 2nd Northampton Regiment, 1901. Creator: Gregory & Co
The 2nd Northampton Regiment, 1901. The 2nd battalion of the Northamptonshire Regiment, a line infantry regiment of the British Army saw overseas service in South Africa

Background imageBoer Wars Collection: In Beleaguered Ladysmith - Watching for Buller from Observation Hill, 1900. Creator

In Beleaguered Ladysmith - Watching for Buller from Observation Hill, 1900. Creator
In Beleaguered Ladysmith - Watching for Buller from Observation Hill, 1900. British surveillance from Observation hill in Spoin kop during the Second Boer War

Background imageBoer Wars Collection: Brigadier-General The Earl of Dundonald, 1900. Creator: Robert Faulkner & Co

Brigadier-General The Earl of Dundonald, 1900. Creator: Robert Faulkner & Co
Brigadier-General The Earl of Dundonald, 1900. Douglas Cochrane, 12th Earl of Dundonald (1852-1935) Scottish representative peer

Background imageBoer Wars Collection: Major-General H. J. T. Hildyard, C. B. 1900. Creator: C Knight

Major-General H. J. T. Hildyard, C. B. 1900. Creator: C Knight
Major-General H. J. T. Hildyard, C.B. 1900. Sir Henry John Thoroton Hildyard (1846-1916) British Army officer who served in the Second Boer War and was General Officer Commanding-in-Chief

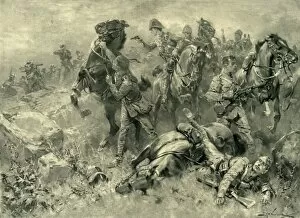
Background imageBoer Wars Collection: Mishap to the Scots Greys at Klippan, February 18, 1902, 1902. Creator: Hermanus Willem Koekkoek

Mishap to the Scots Greys at Klippan, February 18, 1902, 1902. Creator: Hermanus Willem Koekkoek
Mishap to the Scots Greys at Klippan, February 18, 1902, 1902. Klippan was the last battle fought by the Greys in the Boer War, the British suffered many casualties

Background imageBoer Wars Collection: Simons Town, Cape Colony, 1901. Creator: Wilson

Simons Town, Cape Colony, 1901. Creator: Wilson
Simons Town, Cape Colony, 1901.Simons Town on the shores of False Bay, on the eastern side of the Cape Peninsula named after Simon van der Stel

Background imageBoer Wars Collection: Major-General A. Fitzroy Hart, C. B. 1900. Creator: Elliott & Fry

Major-General A. Fitzroy Hart, C. B. 1900. Creator: Elliott & Fry
Major-General A. Fitzroy Hart, C.B. 1900. Major-General Arthur Fitzroy Hart (1844-1910) served in the First Boer War from 1881-82

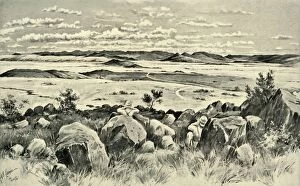
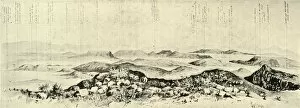
Background imageBoer Wars Collection: The Scene of the Fighting at Monte Cristo Hill on February 19, 1900. Creator: Unknown

The Scene of the Fighting at Monte Cristo Hill on February 19, 1900. Creator: Unknown
The Scene of the Fighting at Monte Cristo Hill on February 19, 1900. Major-General Henry J. T. Hildyards 2nd Brigade captured the 1

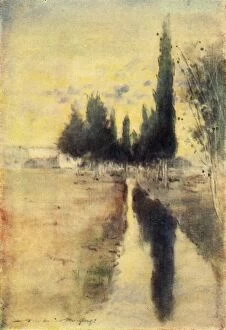
Background imageBoer Wars Collection: A Dutch Village Near Edenburg, 1902. Creator: Unknown

A Dutch Village Near Edenburg, 1902. Creator: Unknown
A Dutch Village Near Edenburg, 1902. Edenburg, a small sheep and cattle farming town about 80 kilometres south of Bloemfontein in the Free State province of South Africa

Background imageBoer Wars Collection: Balloon Map Illustrating the Battle of Pieters and Relief of Ladysmith, 1900. Creator: Unknown

Balloon Map Illustrating the Battle of Pieters and Relief of Ladysmith, 1900. Creator: Unknown
Balloon Map Illustrating the Battle of Pieters and Relief of Ladysmith, 1900. From " South Africa and the Transvaal War, Vol. IV", by Louis Creswicke. [T. C. & E. C. Jack, Edinburgh, 1900]

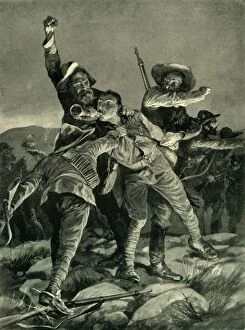
Background imageBoer Wars Collection: The Gallant Bugler of Fort Itala, 1902. Creator: Richard Caton Woodville II

The Gallant Bugler of Fort Itala, 1902. Creator: Richard Caton Woodville II
The Gallant Bugler of Fort Itala, 1902. British forces defend a garrison at Fort Itala, under Boer attack on the full moon, 26 September 1901. From " South Africa and the Transvaal War, Vol

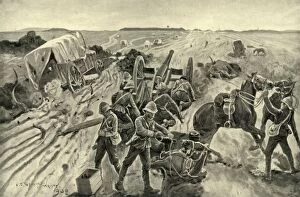
Background imageBoer Wars Collection: The Debacle: On the Track on a Fleeing Command, 1901. Creator: HC Seppings Wright

The Debacle: On the Track on a Fleeing Command, 1901. Creator: HC Seppings Wright
The Debacle: On the Track on a Fleeing Command, 1901. From " South Africa and the Transvaal War, Vol. VI", by Louis Creswicke. [T. C. & E. C. Jack, Edinburgh, 1901]

Background imageBoer Wars Collection: The Relief of Ladysmith - The Last Rush at Hlangwane Hill, 1900. Creator: Rene Bull

The Relief of Ladysmith - The Last Rush at Hlangwane Hill, 1900. Creator: Rene Bull
The Relief of Ladysmith - The Last Rush at Hlangwane Hill, 1900. The Boers, under heavy bombardment abandoned Hlangwane and withdrew north of the Tugela

Background imageBoer Wars Collection: The Blockhouse System, 1902. Creator: Unknown

The Blockhouse System, 1902. Creator: Unknown
The Blockhouse System, 1902. During the Second Boer War, British forces built a large number of fortifications in South Africa which played a vital role in the protection of the railway lines

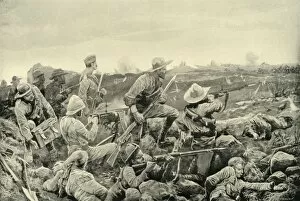
Background imageBoer Wars Collection: Sleepless Mafeking - Hot Work in the Trenches, 1900. Creator: Richard Caton Woodville II

Sleepless Mafeking - Hot Work in the Trenches, 1900. Creator: Richard Caton Woodville II
Sleepless Mafeking - Hot Work in the Trenches, 1900. The Siege of Mafeking took place from 14th October 1899 to 16th May 1900. From " South Africa and the Transvaal War, Vol

Background imageBoer Wars Collection: Major-General Arthur Paget, 1902. Creator: J Russell & Sons

Major-General Arthur Paget, 1902. Creator: J Russell & Sons
Major-General Arthur Paget, 1902. Sir Arthur Henry Fitzroy Paget (1851-1928) British soldier who reached the rank of general commanded the 20th Brigade during Lord Roberts advance through

Background imageBoer Wars Collection: De Wet, 1901. Creator: Unknown

De Wet, 1901. Creator: Unknown
De Wet, 1901. Christiaan de Wet (1854-1922) Boer general, rebel leader and politician planned the surprise attack on Sannas Post followerd by victory at Reddersburg

Background imageBoer Wars Collection: Shell from the Naval Brigade Dispersing Boers from Behind the Seven Sisters Kopjes, 1900

Shell from the Naval Brigade Dispersing Boers from Behind the Seven Sisters Kopjes, 1900
Shell from the Naval Brigade Dispersing Boers from Behind the Seven Sisters Kopjes, During the Action of 7th March at Le Gallais Kopje, near Osfontein, 1900

Background imageBoer Wars Collection: The Formal Surrender of Bloemfontein, 1900. Creator: Joseph Finnemore

The Formal Surrender of Bloemfontein, 1900. Creator: Joseph Finnemore
The Formal Surrender of Bloemfontein, 1900. Bloemfontein, founded as a British outpost by Major Henry Douglas Warden and capital of the Orange Free State surrendered to the British on 13 March 1900

Background imageBoer Wars Collection: Sergeant of the Inniskilling Dragoons, 1900. Creator: Gregory & Co

Sergeant of the Inniskilling Dragoons, 1900. Creator: Gregory & Co
Sergeant of the Inniskilling Dragoons, 1900. The 6th or Inniskilling Dragoons was a cavalry regiment in the British Army sent to South Africa after the outbreak of the Second Boer War in October

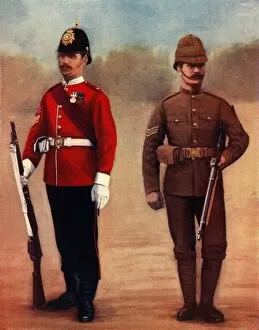
Background imageBoer Wars Collection: West Yorkshire Regiment (Colour-Sergeant) and Yorkshire Regiment (Sergeant), 1900

West Yorkshire Regiment (Colour-Sergeant) and Yorkshire Regiment (Sergeant), 1900. The 2nd battalion of the West Yorkshire Regiment or Prince of Waless Own infantry

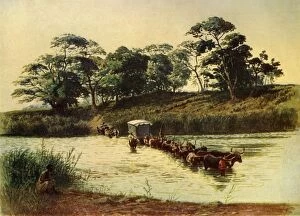
Background imageBoer Wars Collection: Bullock Waggon Crossing a Drift on the Umbelois River-Swaziland, 1902. Creator: Donald McCracken

Bullock Waggon Crossing a Drift on the Umbelois River-Swaziland, 1902. Creator: Donald McCracken
Bullock Waggon Crossing a Drift on the Umbelois River-Swaziland, 1902. The Mbuluzi River known as the Umbeluzi, an important river in Mozambique augmented by various tributaries before its waters

Background imageBoer Wars Collection: The Market Square, Mafeking, 1900. Creator: Unknown

The Market Square, Mafeking, 1900. Creator: Unknown
The Market Square, Mafeking, 1900. The Siege of Mafeking took place from October 1899 to May 1900 during the Second Boer War

Background imageBoer Wars Collection: Majuba Day - Cronje Surrenders to Lord Roberts at Paardeberg, 1900

Majuba Day - Cronje Surrenders to Lord Roberts at Paardeberg, 1900
" Majuba Day" - Cronje Surrenders to Lord Roberts at Paardeberg", 1900. The surrender of Piet Cronje to the British after the Battle of Paardeberg on 27 February 1900 - previously a

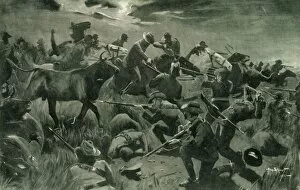
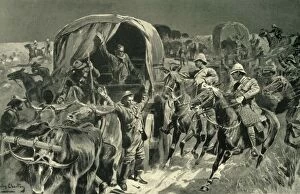
Background imageBoer Wars Collection: Night Attack on a Boer Convoy by Mounted Infantry Under Colonel Williams, 1902. Creator

Night Attack on a Boer Convoy by Mounted Infantry Under Colonel Williams, 1902. Creator
Night Attack on a Boer Convoy by Mounted Infantry Under Colonel Williams, 1902. From " South Africa and the Transvaal War, Vol. VII", by Louis Creswicke. [The Caxton Publishing Co

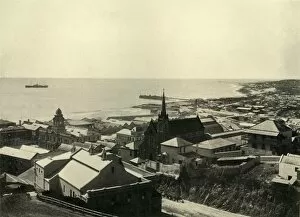
Background imageBoer Wars Collection: Algoa Bay and Port Elizabeth, from the Lighthouse, 1901. Creator: Wilson

Algoa Bay and Port Elizabeth, from the Lighthouse, 1901. Creator: Wilson
Algoa Bay and Port Elizabeth, from the Lighthouse, 1901. Port Elizabeth on the Eastern Cape was founded in early 19th century by the government of the Cape Colony

Background imageBoer Wars Collection: The Battle of Paardeberg, 1900. Creator: Sidney E Paget

The Battle of Paardeberg, 1900. Creator: Sidney E Paget
The Battle of Paardeberg, 1900. The Battle of Paardeberg was fought during the Second Boer War. Piet Cronjes Boer army in retreat, was intercepted by Major General John French at Paardeberg


For sale as Licensed Images

Choose your image, Select your licence and Download the media

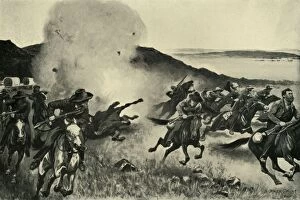
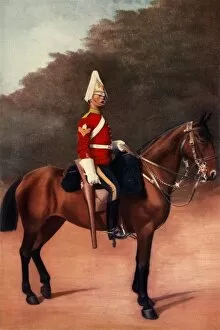
The Boer Wars, a tumultuous chapter in history, witnessed the clash between the British Empire and the resilient Boer republics of South Africa. In this captivating collection of images, we catch glimpses of bravery, desperation, and rallying spirits. Amidst the chaos, we find ourselves in awe as we witness a Household Cavalry-Captain from the 2nd Life Guards during 1900. His unwavering determination is evident as he stands tall amidst uncertainty – a symbol of British resilience. Next, our attention shifts to The Cape Town Highlanders in 1900. Created by JE Bruton, this image captures their stoic expressions and proud stance that epitomize their unwavering loyalty towards their cause. Lord Methuen emerges as an inspiring figure in another photograph taken by Charles Mills Sheldon during his attempt to rally broken forces at Tweebosch in 1902. Despite adversity surrounding him, Lord Methuen's leadership shines through as he motivates his troops to persevere. A moment frozen in time takes us back to November 7th, 1900 – The Night Charge of the 19th Hussars near Lydenberg. This breathtaking creation encapsulates both fear and courage as these brave soldiers charge forward under cover of darkness. Major-General Hector A. Macdonald becomes an emblematic figure captured by Heath's lens in 1900. With his distinguished presence and decorated uniform adorned with medals denoting valorous acts on previous battlefields – he embodies honor and duty. General Sir Bindon Blood steps into focus next; his commanding aura resonating through Donald McCracken's portrait from 1902. A strategic mastermind leading troops into battle against formidable opponents - General Blood leaves an indelible mark on history. John Charlton brings forth a vivid depiction of The Fight at Brakenlaagte: Boers Charging (1902).